Before you start
- A Galon account with at least one project.
Watch it (18 s, no sound)
Silent walkthrough: open API keys, click New key, name the key, choose Send emails, then Create key.
1. Open API keys
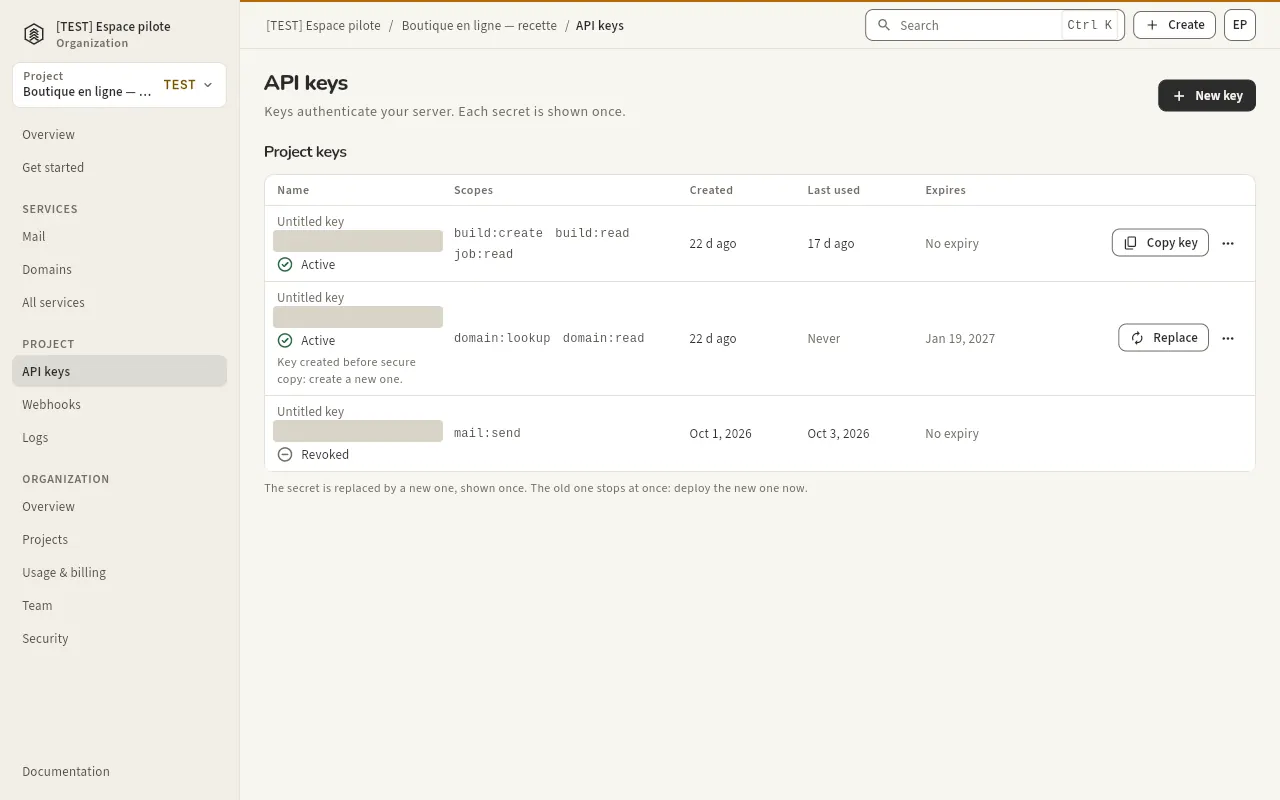
In the console, choose your project in the top left, then API keys in the left menu. The list shows each key's prefix, scopes, last use and expiry, never the secret.
2. Choose what the key can do
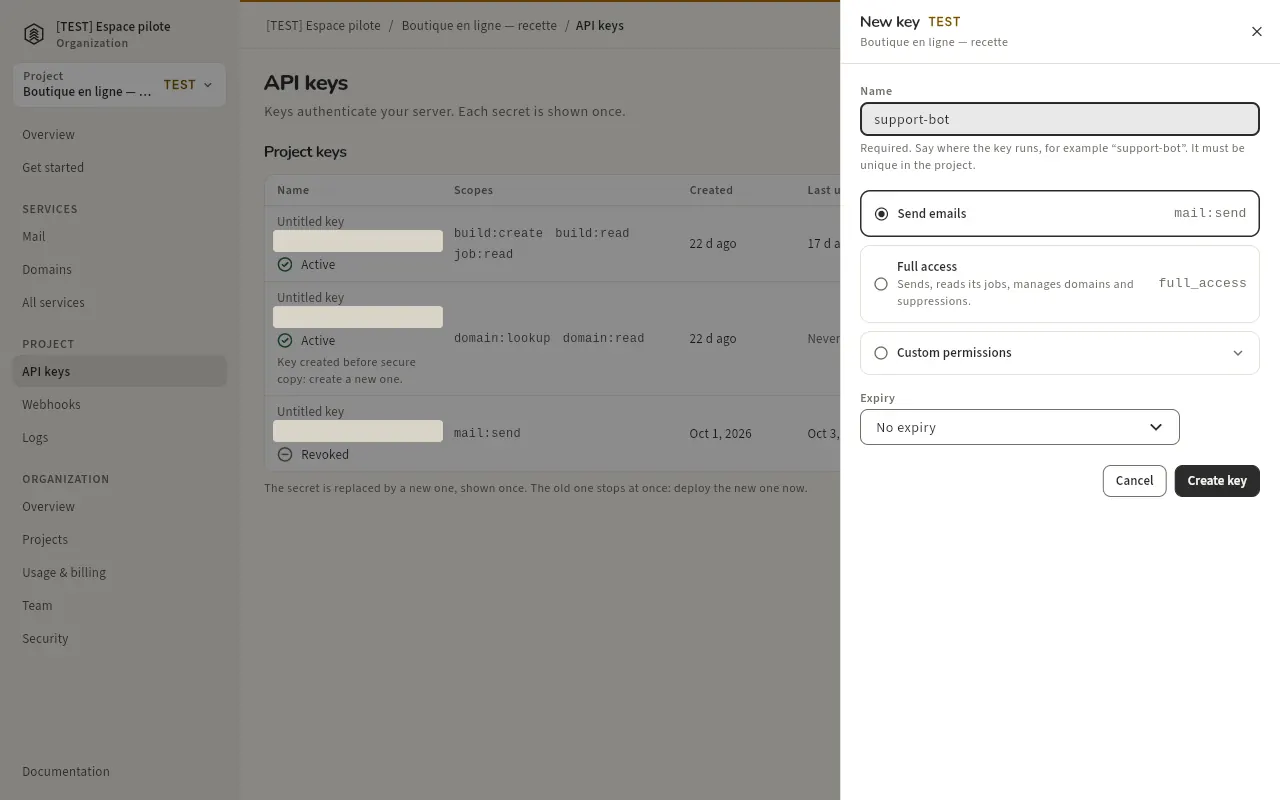
Click New key. Give it a name that says where it runs (for example support-bot), then pick Send emails (mail:send) for a server that only sends, or Full access (full_access) for one that also manages domains and suppressions. Set an expiry if the key is temporary.
3. Copy the secret once
Click Create key. The secret (gln_live_… or gln_test_…, after your project's environment) is shown once: store it in your secret manager or your server's environment. Galon keeps only a hash and cannot show it again.
Your server's environment
export GALON_API_BASE="https://api.galon.ai/v1"
export GALON_API_KEY="gln_..."      # from the console, shown once: never commit it
4. Replace or revoke
Replace issues a new secret and stops the old one at once: deploy the new one right away. Revoke stops a key for good. Both are in the key's row.